...overwhelmed. My broken plate brought me my friend. She was missing. I thought I lost her. But she was found. She has been walking a path of broken being. I talked to her for 3 hours. Well into the early morning hours of a regular Sunday, we spoke. I have not seen that time on a clock in quite some time. Three magical, joyful, painful hours the day I wrote that blog post. It had been years. Too many years.
She sounded more whole than I have ever heard her. She broke. But now she has found strength. A strength that calls her to the quiet life. She is resting in the storm. I love her.
To all of you who feel broken and alone. To all of you who carry the weight of the truth on your shoulder possibly being the only one who knows: You are not what they say you are. You are more. You are living. You are being. You are wonderful. Wear your broken with passion because it completes you. Never cease being curious.
John 8: 32 "Then you will know the truth and the truth will set you free."
Be free.
Thursday, May 31, 2012
Sunday, May 27, 2012
My Plate Died
 |
| Before |
Last night my plate died.
I am sad.
I think there's quite a bit of existential meaning behind the death of this plate. I had a few moments of silence celebrating the life of this plate after it broke. Then I have a few moments of sadness thinking about what the plate represents to me. After that, I felt strange for the rest of the evening. Then, today, our pastor talked about the spiritual discipline of fasting and now I feel like there is something even more meaningful behind the death of my earthenware. It is a beginning. An ending to be sure, but also a beginning. Here's why:
12 years and 1 pervasive relapse later, I am still a recovering anorexic. When I returned home from my in-patient treatment for the disorder in 2000, my friend Valerie made me this plate. I was so scared to eat. I was so scared to live for that matter. Somehow, though, I had to go through the motions of living so that I would survive. Eating was a task not a pleasure. It still feels that way now. After a year or so I was able to eat off of other dishes but I kept this as a reminder of my journey. It has lived in cabinets, displayed on the counter, and now it lives in a really big bowl because I cannot part with it. When eating hurts too much, I pull out this plate. I am reminded that although I do not feel like I am up for the challenge, I can muster the strength to put something in my mouth. Sometimes I wouldn't pull out the plate because I knew I was willingly allowing myself not to eat and it served as a reminder that I am stronger than that. That is sad.
 |
| After |
But this plate made me smile. It entertained my palate. It gave me hope. And now it is dead.
So what does this death represent and why do I feel so connected to it? As I try to process my feelings I cannot seem to reach a solid conclusion. Perhaps the death of the plate means that I am no longer bound to props serving as substitutes for my real life. Maybe I don't need a crutch anymore. Wouldn't that be a joy? 12 years for an anorexic is an accomplishment. Not that I don't struggle with body image and fear on a daily basis but somehow I have managed to keep things in check...until this past January or so. I do not know when the relapse started only that by the time I realized what was happening it was too late. I ate less than I ever have, was more active than I've ever been, and so incredibly lonely. The pain increased and I, in turn, denied my feelings and fought hard to become a perfect storm of destruction.
I have a son. I love him dearly. He needs his parents. Even that was not enough to stop the downward spiral.
Pathetic.
I went back to the things I knew helped before and even then it took months to make any progress. I am better today. Not healed. Not perfect. Not there yet. But I am better and that is something. So maybe the broken plate represents me. I was colorful and lovely and gave hope. I put myself away in a cabinet for a while and let myself, my soul self, go. I pulled myself out every now and then to remind me how exuberant I used to be and then I would hide because I knew the truth. Then I broke. It was too much.
Now I am free to be whatever it is I am to be. Whatever it is I am today. That is enough.
Monday, May 14, 2012
In Time...Lessons from the Garden
 | |
| Friday |
 |
| Monday |
So gardeners, cultivators of gardens and life alike, be still and know that what is coming will come. You have done your part. In time, you will see.
Saturday, May 12, 2012
The Healing Garden: Homemade Baby Food How-To: Boil and Steam
The Healing Garden: Homemade Baby Food How-To: Boil and Steam: $1.00 on sale for 2 containers of baby food...yeah right. $1.00, at least, for 1 container of organic baby mush. I don't think so. I c...
Homemade Baby Food How-To: Boil and Steam
$1.00 on sale for 2 containers of baby food...yeah right. $1.00, at least, for 1 container of organic baby mush. I don't think so. I can make your wallet happy, help fulfill your farm girl fantasies, and delight your culinary senses. Promise. So ladies and gents, put your aprons on, or not if you want to spice things up, and let's do this.
 | ||
| The Loin Fruit enjoying homemade golden delicious apple sauce |
Making your own baby food is no longer for the ultra-earthy or shockingly sheltered. You don't have to have 19 kids and counting to make it work for you. Having a food processor or Magic Bullet helps but even those aren't completely necessary. All you really need are a few utensils, ice cube trays, and a sense of adventure.
Things you must have:
- Peeler
- Knife
- Ice Trays
- Water
- Something to mash with
- Food processor or blender thingy
First things first, do your research and talk to your pediatrician. I am not here to give you advice on what and what not to feed your child (refer to my previous baby food post for my statement absolving me from responsibility for your mistakes). I just thought it would be helpful to have a list of how to do it. And, I just downloaded Instagram for Android and I have tons of fun pictures now.
There are various methods you can use to make your baby food. You can boil, steam, bake, and with some foods like bananas you can just mush them up the way they are. I've only boiled and steamed at this point. Today I am going to bake my sweet potatoes rather than peel, chop, and boil them just to see how they turn out. Peeling sweet potatoes isn't fun.
Stream of Conscious thought for the day:
Have you ever said steam over and over? Having just typed that word several times, it doesn't make sense to me anymore. I just found myself wondering if that's the correct word.
Step 1: Choose your vegetable or fruit
 | |
| Golden Delicious Apples and Sweet Potatoes |
Step 2: Peel said fruit or vegetable (if it needs peeling)

Step 3: Chop em up (I use an apple corer for my apples but a knife works just fine)

Step 4: Cover with water, bring to boil, let cook for about 10 minutes or until desired tenderness is reached

Step 5: Remove from stove and place fruit/vegetable chunks in your food processor (or magic bullet or blender). If you don't have any of these things don't freak. You can use a mash potato masher thingy just as well. The important thing is to create an optimal consistency. You do this by adding some of the water reserve from your cooked fruit or vegetable. If you process, blend, or mash and it isn't liquidy enough then add more water. Conversely, don't add so much if you want a thicker consistency. You can't remove the liquid once it is blended it so I find it easier to go with a less is more approach and then modify if necessary.

* the Loin Fruit now has 4 teeth so and has been eating solids for about 2 months. Per my pediatrician's advice, I make his food a little chunkier.
Step 6: Put in a container and let the puree cool (I don't know that this step is necessary but I have burnt my fingers enough trying to get tablespoon sized amounts into my ice trays. I decided it would be in my best interest to dump my mash into something and let it cool beforehand).
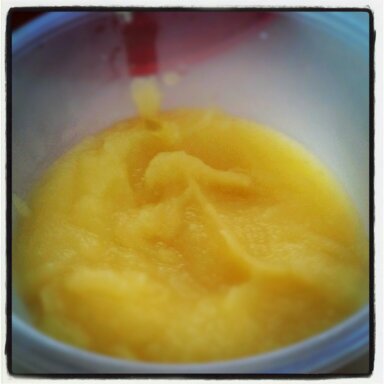 | ||||||||
| Cooling Apple Sauce |
- **Take a spoon, an adult spoon, and taste it. Just do it. Pretty tasty
- Step 7: Take a tablespoon sized dollop and put it into each ice tray space
 |
| Apple Sauce and Cauliflower |
- Step 8: Freeze the trays. Each cube is roughly 1 oz of food so that should give you some idea of how much you are feeding baby. Store the cubes in a freezer safe bag and defrost as needed. Each batch is good for about 3 months but you probably won't even need to know that fact.
- Step 9: Feed the loin fruit
 | |||
| All Gone |
- Step 10: Watch your delightful loin fruit try and feed the cat his goodness

Wednesday, May 9, 2012
Homemade Baby Food...Yes you!
 |
| The Loin Fruit |
There are several reasons for making your own baby food. It's cost effective. You know exactly what's in it and therefore what is going into your baby's mouth. And, you get bragging rights. Now the last thing isn't the reason you should make your own baby food but it's pretty fun to say that you did. However, you then have to admit how easy it is slapping that pride you felt for a second into outer space. Don't lord your baby mama skills over people. That's rude.
Before I started making food for the loin fruit, my son's unofficial name, I did a ton of research. I read all sorts of things and decided this was something I could handle. I like making stuff (except my own food...another story entirely) so this seemed like a natural step for me. We didn't start the loin fruit on solids until he was 6 months old. You can start earlier. It's your prerogative. After talking with my pediatrician and doing my own research, I decided to wait until 6 months to hopefully avoid unintentionally aiding my child's immune system into developing food allergies. I skipped rice cereal because my ped said it wasn't necessary.
Using the 3 day rule, I started implementing new foods. The 3 day rule just means that you introduce a new food and then wait 3 days or so to be sure your child isn't having any issues with it. We started with smashed bananas. He freaked. The loin fruit loves to eat. He doesn't care when or where. He wants it all. I personally believe the whole "babies will stop eating when they are full" is crap. Loin fruit never stops willingly. He nurses (the girls are woefully inadequate in the milk production arena but I keep giving it my best shot), downs an entire bottle, and then dives head first into whatever I set in front of him. It has been a whopping 2 months since we started solids and here's a list of his meals so far:
- Bananas
- Apples
- Pears
- Mango
- Blueberries
- Avocado
- Peaches
- Strawberries
- Peas
- Green Beans
- Cauliflower
- Broccoli
- Sweet Potatoes
- Yellow Squash
- Butternut Squash
Loin fruit, like the honey badger, don't care. I haven't had any issues with food refusal yet. He eats whatever. Recently I added rice circle things to his repertoire. Those things are good. Seriously, have you ever tried them? I'd eat them myself in a pinch. I discovered with that loin fruit's main objective with the snacks is to grasp them tightly. I don't know that he cares about eating them. I believe it is all about controlling them...wonder where he gets that?
I have to state that I am not an expert on child nutrition. I am not a doctor. I cannot diagnose or treat your child. I don't want to. Don't ask. I am just putting all this out there in case someone reads this, chooses my route, and then has a problem. TALK TO YOUR DOCTOR PEOPLE. Read my blog because it's fun. Get your medical advice from a trained professional not a neurotic mind traveling gardener.
My next post will be a basic how to. How to prepare your own baby food. What you need to do so. Ways to save some bucks and hopefully feed your creative spirit in the process.
Shall We Soap?
I adore smell goods. My three favorite places are the Indian River Soap Company, visit them at Indian River Soap Company , Michaels craft store, and Home Depot, homedepot.com. My mind literally explodes with possibilities every time I walk into these places. My wallet and husband do too. This post has nothing to do with Home Depot by the way. I just thought you might like to know where you can buy my presents. I might be on a first name basis with the folks who run the garden center at the HD; I'm just sayin. Today's project involves making your own glycerin soap. Before you scoff, let me assure you it is super easy. I just the good ole "Melt and Pour" method. Here are some links to pages that will assist you in this endeavor:
Handmade Glycerin Soap
Lavender Rosemary Recipe from Herb Companion
What You'll Need:
Step 1: Buy a chunk of glycerin soap.
I buy mine at Michaels but there are tons of online outlets from which you can choose.
I prefer glycerin because it is easy and very moisturizing. I like knowing that what I am putting on my skin is simple and love knowing that I actually made it.
Step 2: Purchase some essential oils.
I really like the NOW brand of essential oils Now Foods.
I purchase my oils at my local health foods store, Paradise Health. You want to make sure you are getting the highest quality ingredients and although you may pay more I believe it is worth the money. These oils are highly potent and long lasting.
Step 3. Pick some herbs from your garden
Don't freak out if you don't have a garden...yet. You can purchase lots of fresh herbs right from your grocery store. I particularly enjoy using Lemon Verbana, Rosemary, Lavender, and Peppermint while concocting my soaps. The types of herbs and oils you use will be entirely dependent on your preference. See how great this is. An adventure in which you get to be the sole creator and consumer.
Step 4: Get yourself some soap molds
Honestly, my favorite thing to use is a washed out coffee creamer carton. My nifty sis-in-law Leigh told me this trick. I love the size of the soap that comes out. However, if you want to make a marbled looking soap you can't use this. You'll want to purchase some kind of mold. Be creative!! Your soap doesn't have to look like soap. It can be whatever you want it to be.
The Soap Making Process:
Step 1: Begin your herb infusion (if you are using fresh herbs)
To make an infusion, put your herbs in a container that will safely hold boiling water. Boil some water.
Pour about 1 Cup of water over the herbs and let them steep for 10 minutes or so. Enjoy the smells wafting from your counter top while you move on to the next step.
 Step 2: Melt the glycerin down
You'll want to determine just how much soap to make before you melt it down. I like using 16oz, roughly half a carton, because it fits nicely in my creamer cartons. Using a microwave safe container, put your glycerin chunks in and melt down in increments of 40 seconds.
Step 3: Pour the water from the tea infusion into the melted glycerin and add your essential oil/oils.
Lots of recipes have exact measurements for this. I don't. I just dump the oils in until there is a freakishly strong scent emanating from them. I like to be bombarded by smells. This is your call. Whatever you feel like, do. Isn't it nice to have permission to do whatever you want. You are welcome!
 Step 4: Pour the mixture into your carton or mold. Let cool. I like to put mine in the fridge to speed up the process. This only takes about 30 minutes or so. Then I take the hardened soaps and put them in the freezer for a few minutes to help get them out of the molds.
Step 5: Take a bath and congratulate yourself on how awesome you smell.
Step 6: Give some away. You'll have more soap than you can possibly use so why not make someone else smell good too?
Handmade Glycerin Soap
Lavender Rosemary Recipe from Herb Companion
What You'll Need:
- Glycerin Soap Base
- Essential Oils
- Herbs from your garden to make a tea infusion (not necessary but super fun to include)
- Soap Molds
Step 1: Buy a chunk of glycerin soap.
I buy mine at Michaels but there are tons of online outlets from which you can choose.
I prefer glycerin because it is easy and very moisturizing. I like knowing that what I am putting on my skin is simple and love knowing that I actually made it.
Step 2: Purchase some essential oils.
I really like the NOW brand of essential oils Now Foods.
I purchase my oils at my local health foods store, Paradise Health. You want to make sure you are getting the highest quality ingredients and although you may pay more I believe it is worth the money. These oils are highly potent and long lasting.
Step 3. Pick some herbs from your garden
 |
| Lemon Verbana, Rosemary, French Lavender |
Step 4: Get yourself some soap molds
Honestly, my favorite thing to use is a washed out coffee creamer carton. My nifty sis-in-law Leigh told me this trick. I love the size of the soap that comes out. However, if you want to make a marbled looking soap you can't use this. You'll want to purchase some kind of mold. Be creative!! Your soap doesn't have to look like soap. It can be whatever you want it to be.
The Soap Making Process:
Step 1: Begin your herb infusion (if you are using fresh herbs)
 |
| Rosemary Lavender Infusion and Lemon Verbana Infusion |
To make an infusion, put your herbs in a container that will safely hold boiling water. Boil some water.
Pour about 1 Cup of water over the herbs and let them steep for 10 minutes or so. Enjoy the smells wafting from your counter top while you move on to the next step.
You'll want to determine just how much soap to make before you melt it down. I like using 16oz, roughly half a carton, because it fits nicely in my creamer cartons. Using a microwave safe container, put your glycerin chunks in and melt down in increments of 40 seconds.
Step 3: Pour the water from the tea infusion into the melted glycerin and add your essential oil/oils.
Lots of recipes have exact measurements for this. I don't. I just dump the oils in until there is a freakishly strong scent emanating from them. I like to be bombarded by smells. This is your call. Whatever you feel like, do. Isn't it nice to have permission to do whatever you want. You are welcome!
 | ||
| Soap |
Step 5: Take a bath and congratulate yourself on how awesome you smell.
Step 6: Give some away. You'll have more soap than you can possibly use so why not make someone else smell good too?
 |
| Happiness to Share |
Tuesday, May 8, 2012

GARDEN ART
Necessary Imperfection for the Restless Soul
Apparently re-purposing is the new fad. I had no clue. I regularly use my old crap to make new things and my project for today was no exception. I love to sit outside in my yellow adirondack chair and dream. I regularly practice pretending and go on adventures to fictional locales. I've traveled the world sitting in my chair.
One of my most favorite things is the hodge-podge garden refuge I created in my backyard. I sit in my chair and pretend that I have a luscious garden that feeds an entire community. I am not a master gardener. Not even close. However, I love the wilderness I have created and now am enjoying sassing it up with homemade projects. Primarily because I cannot keep spending money planting things. I don't have a ton of planting space. Why not make my garden even more me but putting a bunch of stuff in it?
Today's project is making "Garden Art" from your old stuff. This whole venture took about 20 minutes. I tend to get creative ideas and then just start moving. I don't plan...sometimes to my detriment but more to my pleasure. This creation was no different. I have several old window frames living against the walls of my house so I decided I should paint one. No real reason to do so apart from my baby is asleep and I need to make something.
What you need: An old window frame (or picture frame, mirror, etc.), Painter's tape, plastic bags (who doesn't accidentally leave their reusable grocery bags in the car and return home with too many plastic ones instead), spray paint, nails, and a hammer.
Step 1: Tape Your Frame

It doesn't have to be perfect. Don't freak out.
Step 2: Remember that you don't want to get paint on the glass panes after you've already taped the frame so scrape something together to fix the problem. Enter plastic bags.
 |
| Plastic Bags and Tape |
Step 3: Spray paint (it doesn't have to be a work of art people). As you can see, I started painting before I applied the plastic bags and I forgot to remove some of the excess painters tape so the frame isn't evenly coated.
 |
| Red is my favorite color |
Step 4: Hang the frame. Remember to keep it crooked as an homage to reality. Perfection in not the goal but rather a life well lived.
 |
| Hang the frame. Let it stay lopsided. |
Subscribe to:
Posts (Atom)