Living in the imperfection.

Monday, January 14, 2013

To the Farm

Have you ever taken the time to think about where your food comes from?  Not where you purchase your victuals but where they are born, how they live, how they are grown and nurtured, how they die, how they are transported, how they are treated?  I suppose I have had some awareness on this topic for quite some time but recently it has been living in the forefront of my mind.  I often think about places where there are no options.  I know I do not live in one of those but how can my daily living impact the lives of others within my community and outside of it.  My own garden has taught me so much about caring for something else.  My own child has taught me more on the topic than any other singular thing.  You might be thinking, "but it is just food."  Indeed, it is just food.  The one thing that we all need to survive and so greatly impacts our health and environment.  So on the one hand it is "just food" but on the other it is so much more. 

I recently joined a CSA (community supported agriculture) organization here in Melbourne called Florida Fields to Forks.  It is a wondrous thing I tell you, wondrous.  I have become increasingly interested in producing my own food and since I live on a plot of land the size of a postage stamp I am painfully aware that I cannot do this all on my own.  Those of you who follow my blog know all about my garden and the joy it brings me.  Florida Fields to Forks is a natural extension of my homesteading love and I am so glad I found it.

I felt like Liz Lemon, "I want to go to there."  I want to go to there, the farm, and live forever.  I really do.  I often feel like a restless wanderer and have come to accept this fact but when I am at the farm I feel like I am home.

The owners are Jan Pence and Brock Hall, a delightful mother son team.  I do not know either of them well but I do hope that changes over the course of my interaction with them on my visits to the farm.  What is so great about a CSA is that it is financially supported from within by its members.  A one time fee of $35.00 grants you membership into the organization and from there you can order glorious organic grass fed meats, raw milk, cheeses, eggs, nuts, and crazy fun produce.  I wholeheartedly believe this is the best $35.00 I have spent in quite some time.  Produce orders need to be submitted ahead of time and are picked up on Thursday.  My first order was two weeks ago and I am hooked.  

My first Pick-up
The Loin Fruit and I made our way to the farm on Thursday and this array of vegetation was on display in all its glory.  Seriously people, I teared up.  I know that sounds super melodramatic but it is the God's honest truth.  They probably thought I was crazy.  Here is what we drove up to:

The Stables

We parked and walked up to the stables where you go to pick up your order.  First off, it is beautiful.  Like, "I live in the country and wear aprons while I churn my own butter in the sunny 60 degree weather," type beautiful.  My soul started singing immediately.  I felt connected to this place.  It was like all my inner yearnings became manifest in this one location.

After we picked up our order, the Fruit and I did some exploring.  Have I mentioned that on pick-up days it is "open farm."  You can wander around and see the animals.  I die.  

Checking out the view

Testing the Tractor

Field of Dreams

We had a great time exploring and I have deemed every Thursday "To the Farm" day.  I think I need these visits for the nurturing of my soul and I want the Fruit to know what open expanses of land look like.  I want him to know horses and cows and pigs and chickens.  I want him to be connected to the land.  I want that for myself too.  

If you have any questions about the Farm please ask me.  Visit the links I have set up to find out more about Florida Fields to Forks.  You won't regret it.

Happy Eating All.


Wednesday, January 9, 2013

I cried


I get to do life with this kid.  Call me lucky.  Call me blessed.  
Call me exhausted.

Chagrins with the Fruit 

But this kid gives me more pleasure than anything or anyone on this earth.  Sometimes I just have to be really stupid to remember that.

Case in point.

A few days ago my friend Dana asked if I could help her out with a photo shoot.  She's a supreme photographer and sometimes I get to tag along and hold her equipment.  I love it.  I need moments of creativity throughout the day to keep me sane.  Bonus for me is that Dana is cray cray in the best imaginable way.  I let her know I was available but that the Loin Fruit would be with me and asked if that would be a distraction, knowing full well it would be.  I didn't get her reply until I was sitting in my car in the parking lot of the gym.  Side note:  I typically go to the gym everyday at the same time.  Gives me some stress relief and allows the Fruit to have some play time at the kid zone.  Win win for both of us.  I usually leave my phone in his diaper bag so I won't get distracted or break it while I'm getting my sweat on.  I had just put the Fruit in his car seat and closed my own door and decided to check my phone before I pulled out.  Safety first!  That's when I got her text confirming my suspicions.

And then I got angry.  Angry at my son.  Angry because I couldn't go do something I wanted to do and the only reason why was because of him.  

The anger was fleeting and lasted mere moments but it was enough for me to feel terribly ashamed of myself.  I actually got mad at my innocent child through no fault of his own.  None.  He was doing nothing more than existing in my backseat and I resented him for it.  

Then I cried.  I cried because I was angry.  I cried because I couldn't do something I wanted to.  I cried because I am selfish.  I cried because I don't know if it is wrong to desire things.  I cried because I keep feeling like my Jesus is telling me that my life truly isn't my own.  I cried because I don't like that very much.

All those tears and all those emotions in like 2 minutes.     

I don't exactly know why I am sharing this.  I guess it helps to process things and it has been a few days  since the aforementioned "incident."  What I learned from it is that I suppose it is okay to be angry or frustrated but not at my child simply because he is here.

Motherhood is hard.

Saturday, January 5, 2013

Simplification

Greetings Readers,

I have spent so much time focusing on my projects and attempting to update them on various locations within the internet that I am tired.  Therefore I am making a change.  From now on, it is just "In The Garden With Lauren." I live here in this space.

From Junk to Joy


From This to That

So we have a small one drawer contraption thingy that has been sitting in our bathroom for years holding various odds and ends.  Basically, it is a bathroom junk drawer.  I bought it for $10 at an antique shop quite a while ago and it has always been black.  Here's the thing:  I love to think about being crafty but I don't necessarily enjoy the process.  I definitely don't think scrapping paint is fun but it is a necessity, at least for this project, and had to be done.

Said Black Drawer Thingy

I decided that I would try and strip the paint and then put my own spin on things.  There are a few things you will need before you begin making your visions reality.

1.  Paint Stripper
2.  Rubber Gloves
3.  Metal Bowl
4.  Paint Brush
5.  Drop Cloth
6.  Lots of freakin patience

Step 1:  Gather Your Supplies
Stripping agent, metal bowl, brush

Don't forget your rubber gloves you sexy beast


  **ALWAYS ALWAYS ALWAYS wear protective gloves.  This stuff can be nasty and you don't want it infiltrating your skin.  Protective gloves aren't sexy.  That's okay.  You are still a diva.

Step 2:  Apply Stripping Agent
-Be sure to read the instructions on the back of your stripping agent.  This will tell you how long you can expect to wait before the paint can be successfully removed.  Citristrip, the brand I used, was ready to go in 30 minutes but I found that waiting about an hour was actually better for this project.


Step 3:  Using a metal or plastic scrapper, gently scrape away the paint.  I tend to try and get a workout in at every possible opportunity and this mantra certainly applied to my sanding experience.  I made my shoulders needlessly sore scrapping the paint.  Trust me, this isn't the best way to go with this.  Gentle and slow really does work best.  The harder your scrape and the more force you use the more likely you are to get sore and damage the wood.

Sand Paper Fun

Step 4:  Sand.  I hate sand paper.  I hate the way it feels.  I hate the way it sounds scraping flesh away.  I hate the sensation of holding it.  However, it is necessary if you want a smooth surface to work your magic.  Come on, you've come this far so why not finish in regal style.  If any of you are ardent sand paper haters like myself, I found that sticking out my tongue while sanding seemed to help.  Don't know why? 

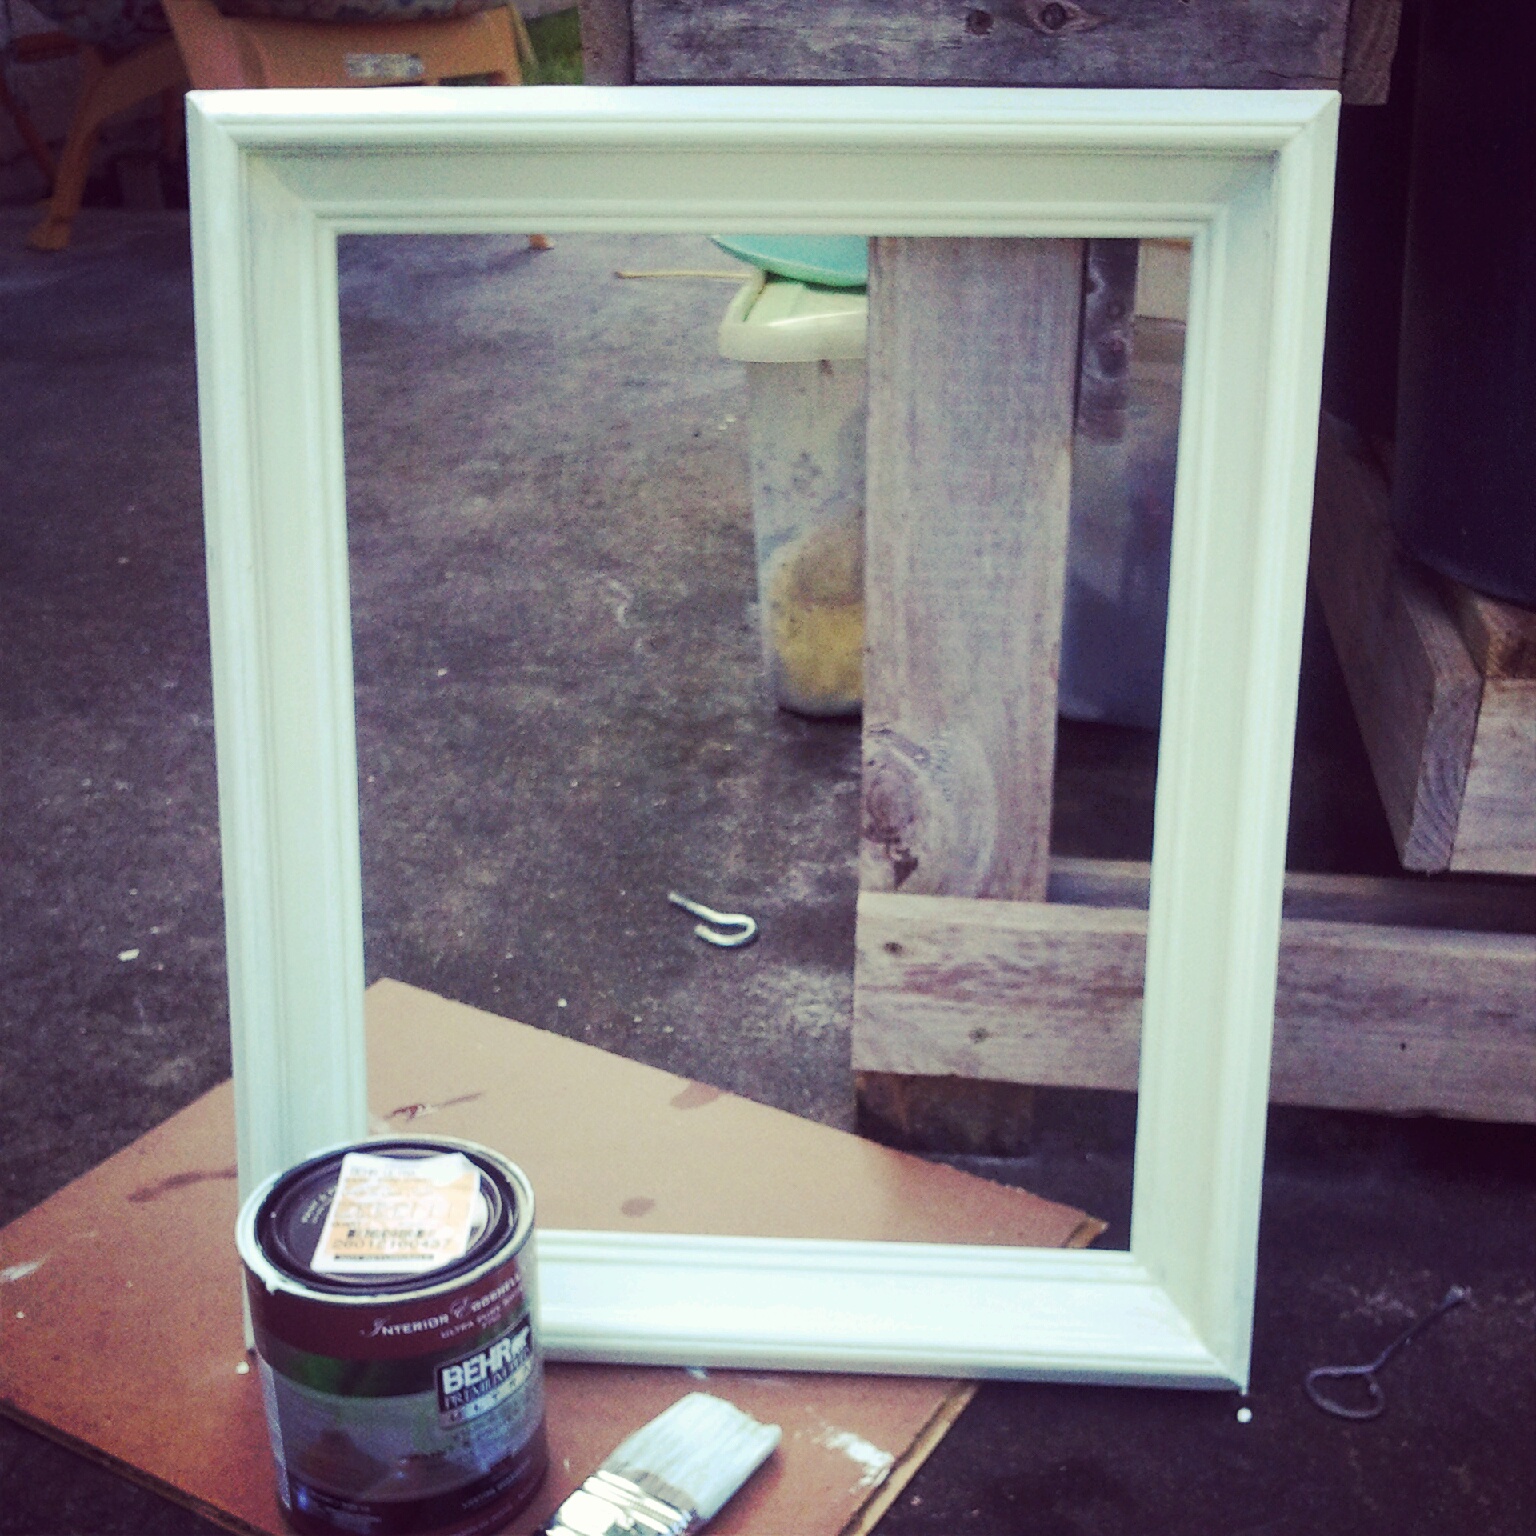
Step 5:  Paint.  This is the fun part.  This is what you've been waiting for.  This is when you get to see your ideas come to life.  I suggest using a paint and primer in one.  I used Behr Paint and Primer and was impressed.  I also figured out that I probably didn't need to do all the stripping beforehand because the primer in the paint covered the interior area that I wasn't able to apply the stripping agent to.  Oh well, I learned something in the process.

2 Coats of Paint

Step 6:  To be Continued.  I'm almost done with the project.  My next step is to use the dreaded sand paper once more and distress the edges of the piece.  I'm going for a coastal-worn look.  I'll be sure and post pics when I'm done.

I finally finished the project.  I roughed up the edges using sand paper until I liked the look.  Here it is:


My Garden Center


My New to Me Garden Center

So it is officially FALL here in on the hot peninsula.  All this really means is that the temperature isn't above 90 degrees but I'll take it.  Anything that even hints of a seasonal change is worth celebrating down here.  I decided a few days ago that FALL is my favorite.  Something about the slightly cooler temps combined with the arrival of dragonflies and butterflies all in the same month gets my motor running.  FALL also happens to be primetime gardening season so I have been peeping the garden for new arrivals.  You can read all about the goings on of my garden at Lauren in the Garden

A few weeks ago I found a gem at the Women's Center Resale Shop and decided it was going to be my new garden center extravaganza.  It took me a little while to figure out what to do with my new-to-me mini kitchen island but I finally decided it should live in my garden.  It is now happily residing on my patio and loving the cooler weather.  Here's how it all went down.

For whatever reason I didn't get a true before shot of this piece.  It wasn't anything spectacular.  Just your standard floating 2 tiered island.  It was stained a light maple color which I didn't think I needed to strip first...I really should have and it is only because of my lack of foresight that I ended up with the subtle woodgrain look I ended up with.  I wish I could claim credit for the outcome.  I can't.  But I really like it.

So, Step 1:  Find a fun color of exterior paint and go to town.  I used a paint from RustOleum.  I bought a small sized can, because I'm cheap, and it was exactly enough.
-I put two coats of fire engine red on this little diddy.

...Ater I Painted it Red

Step 2:  Polyurethane the crap out of it.
-I chose a clear polyurethane so that the vibrancy of my stand wouldn't be compromised.  The brand I chose was Helmsman Polyurethane.  I was pleased with the result.  The Hot Papa, my genius husband, put a strip of painter's tape around the outside of the can to prevent the stain from dripping and it worked wonders.  You can be all official and pour the polyurethane into something else and drip your paint brush in there but I decided to cut that corner and it worked out just fine.  One thing to be aware of is that stains tend to bubble.  Gently roll the can back and forth a few times to remove the air bubbles and you should be fine.
I knew this piece was going to live outside so I put 4 coats on it.  Just read the directions on your brand and it will tell you how long you can wait between coats.  Also, if this piece was going to live inside, I would have probably sanded between coats.  Just and FYI.  While I loathe sanding, it does create a smoother surface.  I wasn't concerned about that with this project.

Helmsman Poly (those in the know call polyurethane "poly." Now you can sound cool too!!!)

Step 3:  Enjoy your finished product!!
-The entire project took about a week for me to complete.  I took my time and painted and stained when I could.  You could probably get this done in one weekend if you wanted.  I LOVE IT!!!  As you can see, I've got a few smaller pots living on top of my new garden center.  My plan is to experiment with different methods of growing cuttings from my garden lovlies.


Finished Product, woot woot.

It Is Finished


It is Finished

I finally finished my one-drawer contraption this weekend and here's the final product:


I roughed up the edges using sand paper.  I tried not to over think the process and just sanded the edges until I liked the look.

Just as a reminder, here is the before:

Before...

And here's the after.  I'm pleased.

After...

Christmas Wreath Beginnings


Christmas Wreath Goodness


All kinds of Fun!!!

The Pieces of My Wreath
I try and avoid Pinterest because I tend to get overwhelmed with all the possibilities ..and there is a positive correlation between the amount of time I spend on Pinterest and the length of my hair.  That being said, I did peruse the site a few moments last week and saw a couple of Christmas ideas which I'm working on now.  I suppose it may be the Southern in me, but I love a good wreath.  Don't judge me.  Just go with the goodness that is a door hanging.  I have fond memories of my mom making wreathes over the years and now I find myself doing the same...cause I'm just like my mom.
Well, over at Pinterest I found a couple of ideas and have decided to combine them.

Here's the first wreath that caught my fancy:

You can find it here:  This Flourishing Life

I really like the non-traditionalness of this but it still satiates my desire for all things wreath related.  It is just this side of tacky but still super fun.  I'm down with that.  Plus, who doesn't have an old frame stashed somewhere around the house.  You don't have to use one this big either.  You can use a 5x7 just as well.  Who cares? It's your door!

                        Here's the next thing I found:

Find it here:  My Pinterest Board

I think this is a superb idea.  Again, perhaps it is the Southern girl in me, but I love a little monogramming.  I cannot believe I'm admitting this fact.  And mom, don't go on a monogramming binge because I said this. 

So here's my idea:  Combine the two.  I'm going to use the painted frame idea and hang a M in the middle.  Now, I couldn't decide on what colors to use so I decided to go with a metallic brown for the frame and use the gold idea from the one above.  I chose this color combo because the wreath can be used for multiple holidays this way.  I can use it to celebrate Fall, Thanksgiving, and Christmas.  Woot Woot.  I'm all for crafting consolidation.   I had an old frame living in the garage that I bought at Goodwill several months back.  It held a creep picture of these two kids.  Seriously creepy, like paranormal demonic creepy (that's why it lived in the garage).  I took out the picture and removed the glass and my frame was ready to be transformed.

Here's what you will need:  A frame, a wooden or cardboard letter, glue gun, magic glitter balls
-I used an old frame and bought a letter from Joann craft store.  You can use whatever you'd like to decorate your  letter but I chose some fun sparkly balls that I bought at Michaels.

STEP 1:  Sand the frame
-I stuck out my tongue and gave the frame a light sanding just to remove any gunk.  As I've stated previously, I abhor sand paper but it is necessary.  Don't spend too much time here just rough up the surface so your primer will stick.

STEP 2:  Prime your frame
-I didn't bother with stripping the stain on the frame because I knew I was going to be priming and painting too.


2 coats of primer

STEP 3:  Paint the frame
-I chose a nice metallic chocolate color.  You can find it here


STEP 4:  Spray paint your letter
-Be Creative!!! This is your wreath and if the holidays mean neon yellow and black then go for it!

Before


After

Step 5:  Glue-gun madness!
-The next thing I did was glue my glitter bombs all over my freshly painted letter.  I did this over a few days when I had the time.  In all honesty, I didn't have a plan or pattern in mind.  I just did what suited my fancy.  If you are one for structure you can plan this step out.  I had fun trying to fit the pieces together.

Good times!


Finished Letter

**I've still got a few steps to go but here's where I'm at up to now.  I'll continue to update this post until I'm done.

Christmas Wreath Completion


Christmas Wreath Goodness Part 2: Completion

The Finished Product


It is finished!  I'm very pleased with the results although I've begun another one and Hot Papa, the husband, informed me this morning that he likes the new one better...oh well.  Second time's a charm right?

So here's the rest of the steps for completion.  When last we met, the wreath looked like this:
Glitter Ball Bombed Letter Goodness
I must admit trying to figure out how to get the letter attached to the frame was quite a conundrum for me.  I ended up threading a stout needle with fishing line and then using a hammer to push it through.  Sounds a little white-trash-like but when crafting at the Maleski household you do whats you got to do.  So I did.  Here's what you'll need to get your glitter bombed letter affixed to your frame:


Beads, Letter (back of it), tape measurer, needle,
clear thread, a hammer (not pictured because I forgot to...oops)
From the above pic, you can see that I've already gotten one side completed.  To make sure my beads on the completed side didn't slide off, I used some duck tape and adhered it to the back.  White-trash-like:  keep it real and practical.

My helpful hammer
Now, you may be asking yourself, "Lauren, just how do I make my glitter-tastic letter float inside my frame?"  Here's how.  Take a stout needle, I'm not sure what gauge it was but it was big.  I threaded it with some fishing line.  I tried to push it through myself but I couldn't so I grabbed a hammer and that did the trick.  By placing the needle on the letter and tapping it partially through, I was able to ensure that the needle would come out the other side (so I wouldn't have a needle living inside of my letter)


Below you'll see the threaded needle, not lost forever inside of my letter.  Tie the loose end on the backside of the letter with several knots to make sure your thread doesn't pull through.  That would be no good!

What you'll get 

I hate measuring.  That's why I'm not a good cook and Hot Papa doesn't like for me to hang pictures.  I prefer to free flow things but in the end there's nothing wrong with a little structure.  To make sure that my letter hung evenly, I measured the frame and then decided where I needed to nail the nails into the backside.  I slammed a couple of nails in after that.


Exactly the same distance from both corners

The last thing to do was string beads onto the fishing line.  That was just a personal preference thing for me.  I kind of wish I hadn't done it and left the allusion of a free floating letter but once I had completed the project I didn't want to go back.  Below you can see the finished product.

Lauren is crafty

So now my monogram lives on my front door.  I'm happy with it.  This project is super easy but does take a little time.  I glued the balls at a snails pace while I watched TV at night.  If I had sat down and done it in one swoop it would have only taken a couple of hours at most.  But I didn't.  I took my time.   

If you are interested in this project check out the first blog post:  Christmas Wreath Goodness for the beginning stages.  Also, I can totally make you one of your own.  But you will have to pay me.  Not a lot.  But something.

Homemade Tree


Viva la Christmas Tree

When I was a teenager my mom decided to do a sort of art deco Christmas tree thing.  She strung pieces of garland around rope and hung it from the ceiling.  The pieces of garland were attached to this wooden disk and in the middle of it was a nativity set.  I thought it was totally strange as a young'en but now I see the genius.  Which brings me to this post.

Last year Michael and I made a 10 foot tree out of scrap wood that we put in our front yard.  

Gargantuan Outside Tree 
I'm fairly certain this tree is some variation of something I saw on Pinterest.  The colors I used were of my choosing and the wood we used to build this thing was dying a slow death on our garage floor.  One afternoon and a few power tools later, Hot Papa and I had a huge tree that lives on the walk-way to our front door...maybe not the best place for it but you can see it from the entrance to the neighborhood so that's something, right?

This year, we decided to bring the design indoors.

Bringing the Party Indoors
If you look closely you can see Hot Papa making spaghetti.  And my messy kitchen table.  Oh well, thus is life.  So now you are probably wondering, "How do I make one of these lovelies ditties?"  Guess what?  I'm about to tell you.  You'll need a few hours, some tools, eye hooks, scrap wood, spray paint, and a sense of humor for this one.  I tend to take a rapid fire approach to creation:  I don't measure and just see what happens.  Hot Papa is much more calculated so this project was a chance for both of us to give a litte.  The tree is straighter than I tend to like and it's not as straight as Hot Papa would have on his own.  Compromise!  So let's get started.

Things you'll need:
1.  A saw.  We have one of these:  DeWalt Circular Saw .  It's a great product and easy to use.
2.  Scrap wood.  We used a 1x4 for the tree trunk and 2x4's and other scraps for the branches.
3.  Spray Paint.  I really like the Rustoleum brand.  Here's a few links to the colors we used for this tree.    Green Meadow and Hunter Green.  Ps.  You tree doesn't have to be green.
4.  Eye Hooks:  Golden Eye Hooks
5.  A Makita electric drill.  That's the brand Hot Papa has and it's pretty fabulous because it charges so quickly.  Honestly, you don't need anything near as fancy but if you or your other likes power tools this is a good one.
6.  Your Imagination!

In order to make the tree branches spaced somewhat regularly we laid out a couple of scrap 1x4s to frame the tree and then took a pencil and made tic marks on the wood we were using as branches to serve as cutting guides.
Our make-do guide
As you can see, we didn't measure (my contribution) but we did use something as a guide (Hot Papa's contribution).  We wanted the "branches" to adhere to a traditional Christmas tree shape so we used what we had and did the best we could with it.  

After you cut your branches the next step is to paint them.  We tied them up to a rope and hung them from a tree branch in our front yard to spray paint them, cuz we are white trash.  We waited an hour or so for them to dry.
Drying Party in the Garage...woot woot!

Once they branches dried the annoying part came in.  We had to attach all the eye hooks so we could hang our ornaments.  This step wasn't hard it just took a while.  First we drilled a hole and then put each eye hook in place.  I did this part.  I didn't have any sort of pattern I was adhering to and by the end I just wanted to be done.  I suggest random placement for your eye hooks.  This takes a little pressure off of being perfect.  Keep your ornaments in mind as you do this step.  I knew what I had so I was able to visualize how much distance between ornaments and I needed.

After you've completed your eye hook placement the only thing left is to screw your boards to the trunk.  Place them however you want.  They can be straight.  They can be crooked.  Who cares?  

Hot Papa made a tree stand for our tree but you can just as easily lean it up against a wall.  

Merry Crafty Christmas!